This service allows you to use the fixed IP address of your SmallWall's LAN Ethernet interface to resolve/proxy all DNS queries on your LAN network. When the SmallWall DHCP server assigns IP addresses, it also assigns the LAN IP address as the DNS server to use. Otherwise, to benefit from this service you must manually configure the DNS IP address on your computers to be the LAN IP of your SmallWall.
If the DNS forwarder is enabled, the DHCP service (if enabled) will automatically serve the LAN IP address as a DNS server to DHCP clients so they will use the forwarder. The DNS forwarder will use the DNS servers entered in System: General setup or those obtained via DHCP or PPP on WAN if the "Allow DNS server list to be overridden by DHCP/PPP on WAN" is checked. If you don't use that option (or if you use a static IP address on WAN), you must manually specify at least one DNS server on the System: General setup page.
This is important for instance if you have your DHCP clients renewing their IP address information every 3 days, but every day your WAN IP changes from your ISP. If your ISP changed the DNS servers on you then it would be 2 days until your DHCP clients received the correct information. By using your LAN IP address, all LAN network clients are assured of a working DNS server as long as the SmallWall has received a good DNS IP address to use... even if it just received the new DNS information a minute ago. This also allows a network administrator to easily redirect all traffic to a new internal DNS server (maybe while transitioning a new server into the network).
Setting "Allow DNS server list to be overridden by DHCP/PPP on WAN" is necessary if your ISP might change the IP address of the DNS server. If you have a static IP address on your WAN than you would not need this option set
The DNS forwarder screen contains configuration options relevant to the DNS forwarding server on your SmallWall.

Enabling the DNS Forwarder Check the first checkbox, "Enable DNS forwarder", to enable the service on the LAN interface. After enabling this, you will need to configure your client machines to use the LAN IP address of your SmallWall as their DNS server.
DNS Host Name Registration
If your SmallWall acts as the DHCP server for your LAN, and you need name resolution between hosts on the LAN, check the "Register DHCP leases in DNS forwarder" box. It will append the default domain in System:General setup to the host name of the computer that is requesting a DHCP lease. For example, if your machine name is my-pc and your default domain is example.com, it will register my-pc.example.com with the IP address assigned from DHCP, so the other hosts on your LAN can locate your machine by that name.
Caution
Be sure that your computers have unique names.
DNS Forwarder Overrides
If there are certain DNS host names you want to override for your internal DNS clients, add them under DNS overrides on this page. For example, if you want www.yourcompany.com to point to a different site internally than it does from the Internet, enter an override for www.yourcompany.com with the appropriate IP address. This can also be used as a rudimentary (and easy to bypass) filter on web sites LAN clients can visit, by assigning the undesired host name to an invalid IP address. For example, to block www.example.com, put in an override to redirect it to an invalid IP address, such as 127.0.0.1. Note that using a different DNS server or editing the hosts file on the client machine gets around this restriction, but doing this is sufficient to block the site for the vast majority of users.
Caution
SmallWall does not do port reflection. (Accessing an internal, NATed resource from an external address) If you have an externally facing site using NAT, you will want to override that address here.
Dynamic DNS allows you to have a permanent host name that can be used to access your network, generally used when your public IP address is assigned by DHCP and subject to change. This allows you to run your own web server, mail server, etc. using a DNS host name.
You must have signed up with a dynamic DNS provider to continue.
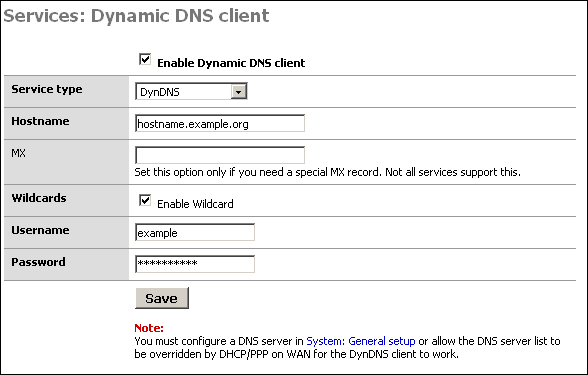
Configuring the Dynamic DNS Client
To start, first check the "Enable Dynamic DNS client" box at the top of the page.
In the "Service type" drop down box, select the service you signed up with above.
Some services support MX DNS records on dynamic DNS subdomains. This helps ensure you can get email to your host name. If your service supports this (dyndns.org is one that does, others do as well), fill in your mail server's host name in that field. If you do not need an MX record or if your provider does not support them, just leave the field blank.
Wildcards - If you want to enable wildcard on your dynamic DNS host name, check this box. This means all host names not specifically configured are redirected to your dynamic DNS name. So if your dynamic DNS is example.homeip.net, and you enable wildcards, www.example.homeip.net, mail.example.homeip.net, anything.example.homeip.net, etc. (i.e. *.example.homeip.net) will all resolve to example.homeip.net.
The next two boxes are for your username and password. Enter your account information from the dynamic DNS provider.
Click Save. Your dynamic DNS host name should immediately be updated with your WAN IP address. To verify this, ping your dynamic DNS host name. It should resolve to the IP address of the WAN interface of your SmallWall. If not, check Diagnostics: System logs for information on why it failed.
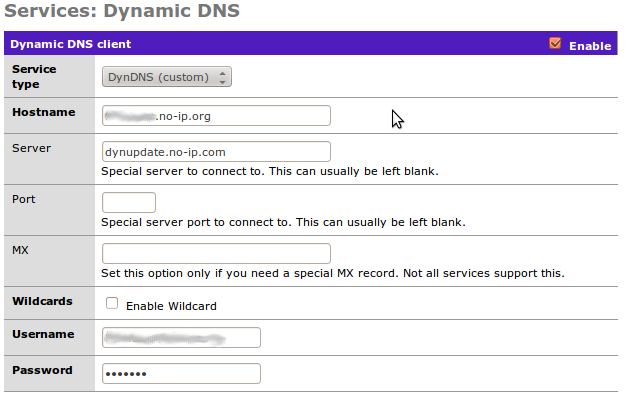
The "Custom" option is handy when you want to use an unlisted Dynamic DNS service. (For example, no-ip.org which the author uses.) It can require some work to actually find the server name, however.
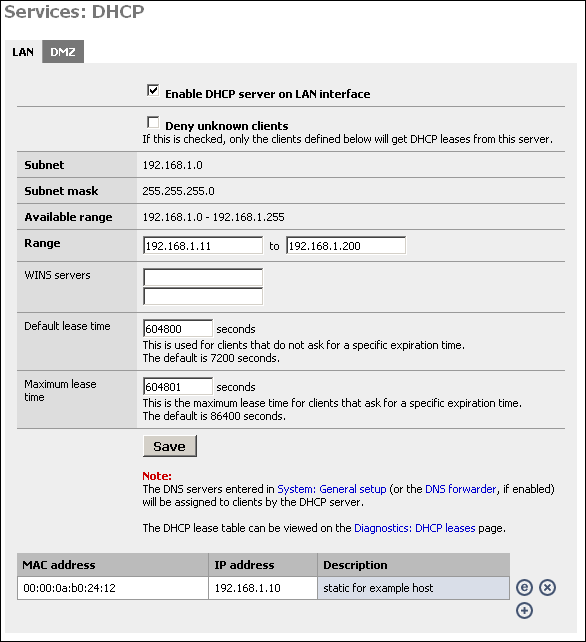
This screen allows you to enable the DHCP server on enabled Ethernet interfaces other than WAN.
Enabling the DHCP Server
To enable the DHCP server on a particular interface, click on the appropriate tab for the interface and check the "Enable DHCP server on interface" box.
Deny unknown clients
This option allows you to implement a more secure DHCP configuration. Many companies suffer from worm outbreaks and related security issues due to unauthorized machines being plugged into their network. This option will help ensure only authorized hosts can receive a lease from your DHCP server. With this option enabled, only hosts defined at the bottom of this page will receive a lease from DHCP.
The downside to this option is that it can be difficult to maintain when you have more than a handful of hosts on your network. Many will find the increased security worth the increase in maintenance. Note that this is only sufficient to stop the typical user that expects to be able to plug into your network and obtain a DHCP lease to get on the Internet. Anyone with network and/or security expertise can easily bypass this.
Subnet, Subnet Mask, and Available range are filled in from the IP and subnet information from that particular interface.
Note
This option does nothing to prevent someone with a static IP address from accessing your network. While handy to dissuade casual misuse, it just not be considered a strong security measure.
Range
In the first box, enter the starting address of your DHCP range. In the second box, enter the ending address of the range. Note that you don't want to make this the same as the available range, as this includes the subnet address and broadcast address, which are unusable, as well as the address of your SmallWall interface which also cannot be in the range. Also leave room for static devices such as printers, servers, and VPN ranges.
WINS Servers
If you use an NT 4 domain, or have pre-Windows 2000 clients that need to access an Active Directory domain, you will need to fill in your WINS server IP addresses in these boxes. If you only have one WINS server, leave the second box blank.
Default and Maximum Lease Time
The default lease time is the length of the DHCP lease on any clients that do not request a specific expiration time on their DHCP lease. The default is 7200 seconds, or two hours. For the vast majority of network environments, this is too low. I would generally recommend setting this to a week, which is 604,800 seconds.
The maximum lease time must be more than the default lease time. Most networks will not use this value at all. In most instances, I set this to one second longer than the default lease time.
Click Save to save your changes, then click Apply to enable the DHCP server.
Static DHCP Mappings
Static DHCP mappings can be used to assign the same IP address every time to a particular host. This can be helpful if you define access rules on the firewall or on other hosts on your LAN based on IP address, but still want to use DHCP. Alternatively, you can keep the IP address box blank to assign an IP out of the available range, when you are using the "Deny unknown clients" option.
Click the + icon at the bottom of the DHCP configuration page to add a static DHCP mapping.
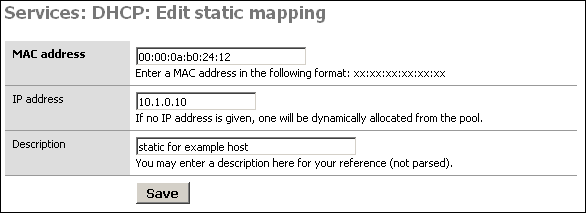
In the MAC address box, fill in the system's MAC address in the format xx:xx:xx:xx:xx:xx. For Windows clients, you can determine the MAC address by opening up a command prompt and typing 'ipconfig'. For Windows 95/98/ME clients, go to Start, Run, winipcfg. For Unix clients, use ifconfig.
Alternatively, you can find your client in the DHCP Leases page and click the plus sign to auto-populate this form with the MAC address.
In the IP address box, fill in the IP address you want to be assigned to the client, or leave it blank to automatically assign one from the available DHCP range. If you put in a static IP address, it must not be within the range of the DHCP server.
It is recommended you fill in a description in the Description box to remind you what this entry is for, though this is an optional value.
Click Save when you are finished and the mapping will be added.
Note
The DNS servers entered in System: General setup (or the DNS forwarder, if enabled) will be assigned to clients by the DHCP server. (If needed a different server can be assigned using the hidden config options)
The DHCP lease table can be viewed on the Diagnostics: DHCP leases page.
SNMP is a Network Management Protocol that allows a central management software to consult information on devices running an SNMP agent. You can enable a SNMP agent on your LAN interface on this screen. This is useful if you have a network management or monitoring system that takes advantage of it. This service uses UDP port 161.
Caution
Retrieving information from a SmallWall SNMP agent is only secured by the community name. All information is transmitted in clear text. If you want additional security you will need to either use filters to limit who has access to this port or access it over an encrypted channel such as PPTP or IPSec.
SmallWall supports read only.
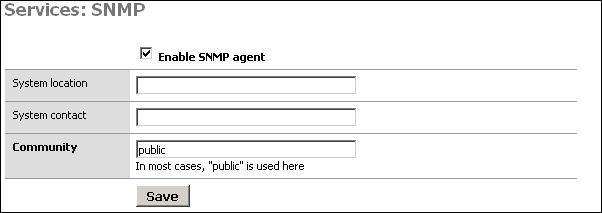
The System location and System contact boxes can be left blank, but can assist you in determining which device you are monitoring if you have several monitored hosts.
The Community is generally set to "public", but if you have any regard for security at all, you should set this to something difficult to guess, containing numbers and letters. This community name is still passed over the network in clear text, so it could be intercepted, though the most anyone could get with that community name is information on the setup and utilization of your firewall. In most environments, this is likely of little to no concern, but is something to keep in mind.
After setting the values as you desire, click Save and your changes will be applied.
Proxy ARP can be used if you need SmallWall to send ARP replies on the WAN interface for other IP addresses than its own WAN IP address (e.g. for 1:1, advanced outbound or server NAT). It is not necessary if you have a subnet routed to you or if you use PPPoE/PPTP, and it only works if the WAN interface is configured with a static IP address or DHCP.
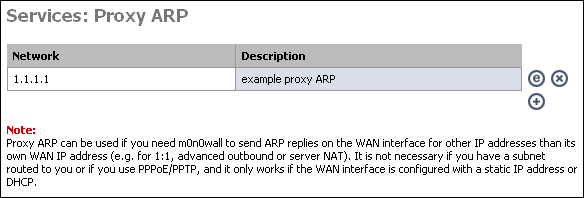
If you enable 1:1, server, or advanced outbound NAT, you may need to enable proxy ARP for the IP address(es) being used by those translations. To do so, click the + on this page.
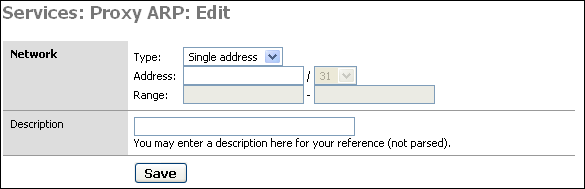
Enter either a single IP address, or subnet or range of addresses, optionally add a description to remind you why you made this entry, and click Save. Then click "Apply changes" for SmallWall to enable proxy ARP.
For more information on when you do and do not need Proxy ARP, see this page.
What is Captive Portal? from wikipedia.org
The captive portal technique forces a HTTP client on a network to see a special web page (usually for Authentication) before surfing the Internet normally. This is done by intercepting all HTTP traffic, regardless of address, until the user is allowed to exit the portal. You will see captive portals in use at most Wi-Fi hotspots. It can be used to control wired access (e.g. apartment houses, business centers, "open" Ethernet jacks) as well.
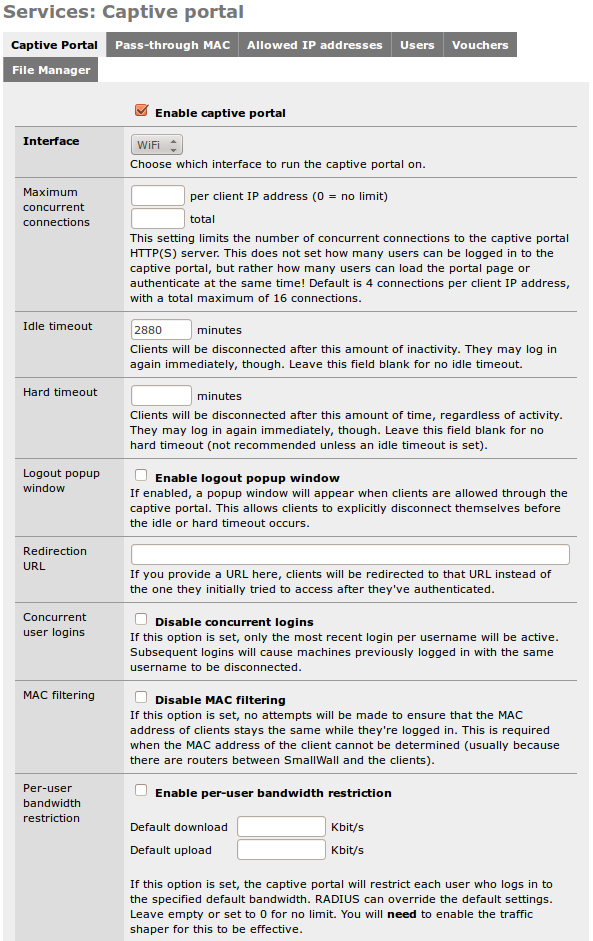
Check the "Enable captive portal" box to enable.
Interface - Select the interface on which you want to enable captive portal. It can only run on one interface at a time.
Maximum Concurrent Connections - This is how many people can be logging in at the same time, not how many times one person can log in. This rarely needs to be changed.
Idle timeout - Clients will be disconnected after this amount of inactivity. They may log in again immediately, though. Leave this field blank for no idle timeout.
Hard timeout - Clients will be disconnected after this amount of time, regardless of activity. They may log in again immediately, though. Leave this field blank for no hard timeout (not recommended unless an idle timeout is set).
Note
If no timeout is set, users will remain logged in until the service is restarted or SmallWall is rebooted.
Logout popup window - If enabled, a popup window will appear when clients are allowed through the captive portal. This allows clients to explicitly disconnect themselves before the idle or hard timeout occurs. When RADIUS accounting is enabled, this option is implied.
Note
Most any popup stopper will block this window. Worse, you cannot exclude a specific site, as this popup appears to come from whatever server the user tried to go to prior to authentication. If you have a popup blocker, you'll need to disable it prior to logging in, and then re-enable it after the log off popup appears.
If you plan on using this functionality, you will need to alert users the the need to turn off the popup blocker prior to logging in. (Which, of course, they will not read.)
Redirection URL - by default, after logging in, SmallWall sends you to the page you originally requested. But you can enter a web page here, such as a page on your business website that says "Thank you for drinking Tweak Bros. Coffee!" SmallWall will then send your browser to that page instead of your original destination.
Concurrent User Logins - This allows a single user name to log in more than once. Or not. If set, login in bumps the last user off.
MAC Filtering - By default, SmallWall makes sure the MAC address does not change during the log in period. (Preventing someone from stealing a logged in IP address) If you have access points that change the MAC address, however, this can be a problem. This allows you to disable that feature.
Per-user Bandwidth Restriction - A way to limit user bandwidth. (Requires Traffic Shaper to be enabled) With RADIUS, it can allow tiered access.
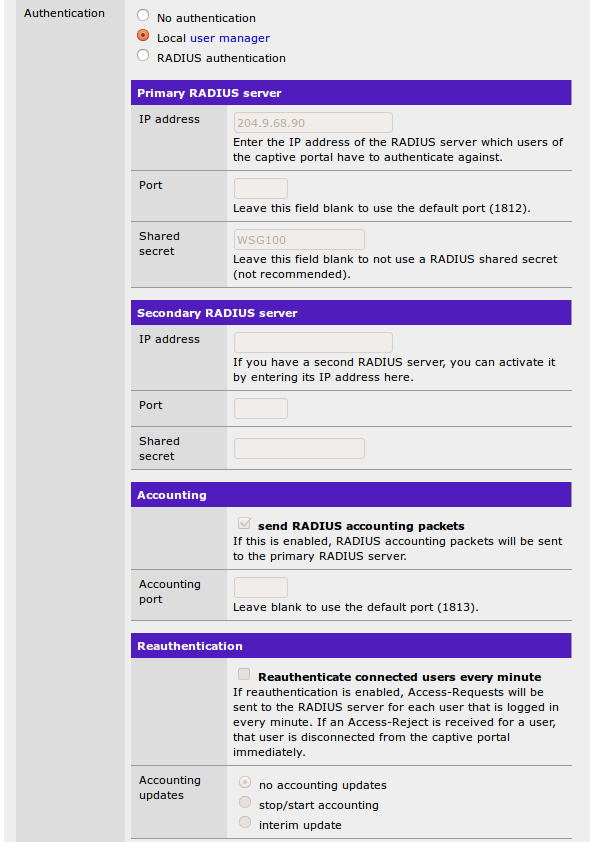
Authentication - This is where you set how the SmallWall captive portal authenticates.
No Authentication - This just displays the captive portal page as a disclaimer. Any username or password inputs are ignored. If equipped, a redirection URL is used when you press the button to submit.
Local User Manager - The user name and password submitted are checked against the captive portal user list. If equipped, a redirection URL is used when you press the button to submit.
RADIUS Authentication - The user name and password submitted are checked against a RADIUS server. Other RADIUS attributes can be used. If equipped, a redirection URL is used when you press the button to submit.
Primary (and secondary) RADIUS server - Enter the IP address and port of the RADIUS server which users of the captive portal have to authenticate against. Leave port number blank to use the default port (1812). Leave the RADIUS shared secret blank to not use a RADIUS shared secret. RADIUS accounting packets will also be sent to port 1813 of the RADIUS server if RADIUS accounting is enabled.
Reauthentication - This will allow a users time to end before the normal timeout period set above. It can also work with accounting if you have time or bandwidth limits.
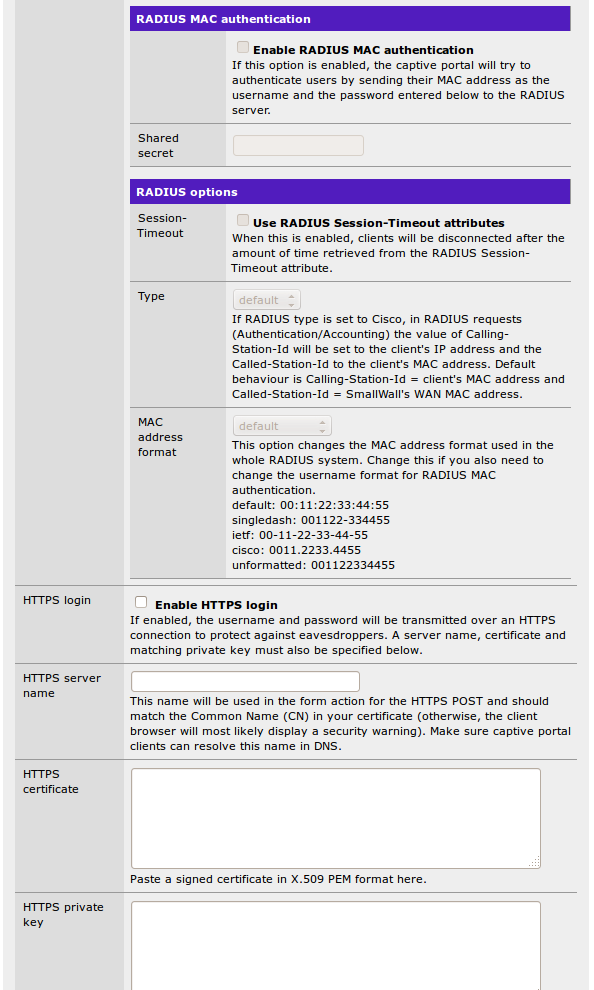
RADIUS MAC Authentication - SmallWall will use the MAC address as the username, and pass the submitted password to the RADIUS server. Note the warning in MAC filtering above for situations where this may not work.
RADIUS Options - Several additional options for extended features or to work with non-standard RADIUS implementations. (Like Cisco)
HTTPS Options - That allows the username and password form to submit over https instead of http. You can specify the server name and upload a certificate here, and it will work with most browsers.
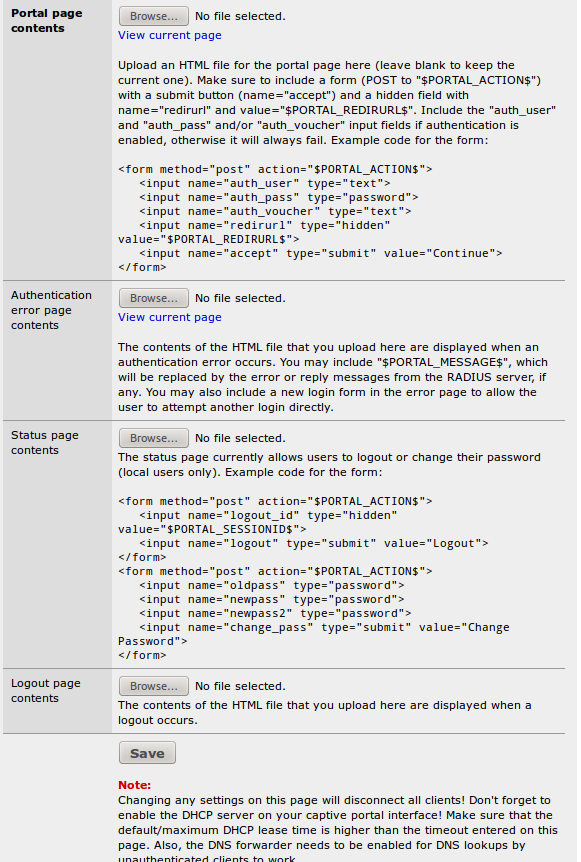
Portal page contents - Here you can upload an HTML file for the portal page (leave blank to keep the current one, or the default if you have not uploaded one previously). The uploaded page can use assets like images and css pages, which are uploaded under the File Manager tab. The default page uses no additional files, but it does use characters in modern extend fonts. The free Symbola Font fully supports these extended characters.
Authentication error page contents - The contents of the HTML file that you upload here are displayed when an authentication error occurs (generally because of an incorrect login or password).
Status Page Contents - A page that will allow local users to change passwords. It does not work for RADIUS users. The uploaded page can use assets like images and css pages, which are uploaded under the File Manager tab.
Logout Page Contents - The logout popup page referenced above. The uploaded page can use assets like images and css pages, which are uploaded under the File Manager tab.
Pass Through MAC - This setting acts as a sort of "pre-authentication list" to allow users access without logging in. However, it only triggers from within captive portal.
Caution
All traffic is blocked until a request is made to port 80 to trigger the captive portal. Consider using Allowed IP Addresses with a static DHCP address instead.
Allowed IP Addresses - The IP addresses listed here bypass captive portal completely. (All traffic, in whatever order) When combined with a static DHCP assignment, it makes the portal totally transparent to specific users, without needed to configure their computers with a static IP.
Users - If you are using Local Authentication, this is the list of users.
Vouchers - You can enable a voucher system here to hand out one time use access. It can work in conjunction with other authentication methods.
File Manager - If any of your custom captive portal pages need additional files, they are loaded here. They can be of any type, but there are size limitations. They are loaded to the same directory as the custom portal page.
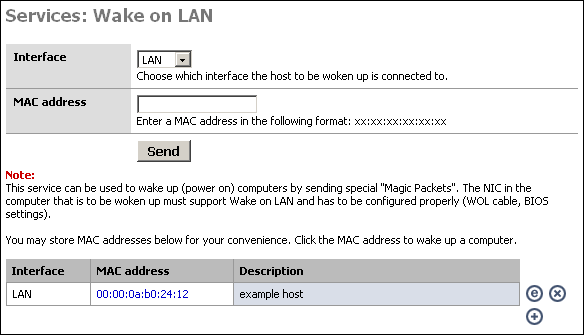
This service can be used to wake up (power on) computers by sending special "Magic Packets". The NIC in the computer that is to be woken up must support Wake on LAN and has to be configured properly (WOL cable, BIOS settings).
This might be useful, for instance, if you access your home or corporate network remotely via VPN, and need to access a machine that may not be powered on at all times. You can log into the SmallWall device at that location and send a wake up packet.
To power on a machine, just choose the appropriate interface, put the MAC address of the machine into the MAC address box, and click "Send".
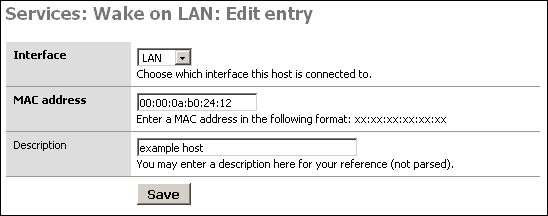
If you use this feature at all, you will probably want to create a list of the machines you want to remotely power on. If you click the + at the bottom of the screen, you can add a host to the list that is displayed. Once you have added the host to your list, you can simply click on the MAC address to power on the system.
SmallWall has a built in scheduler to allow timed jobs to run. It can be set for one time only, or aon a repeating schedule in as short a time as every 1 minute. It can be logged, or not.
Reboot System - This can reboot the entire system, resetting everything to base. This might be used if you have a runaway DHCP table due to some bad clients. However, it is usually better to find out why you think you need to do this then to mask the problem with a reboot. Many systems have uptimes in the hundreds of days.
Reconnect WAN - Many ISPs love to have an idle timeout and drop your connection with PPPoE. Here you can force it to reconnect. It is essentially pressing the "Reconnect" button on the Status -> Interface screen.
Interface - You can enable or disable interfaces on a schedule. For example, turning off the guest network after business hours, but leaving the business network up.
Traffic Shaper - You can set most traffic shaper attributes, including total bandwidth, on a schedule.
Wake On LAN - You can start the server in the morning that is set to sleep each night...
Execute Command - And as a catch all, you can execute any Unix command SmallWall can run.